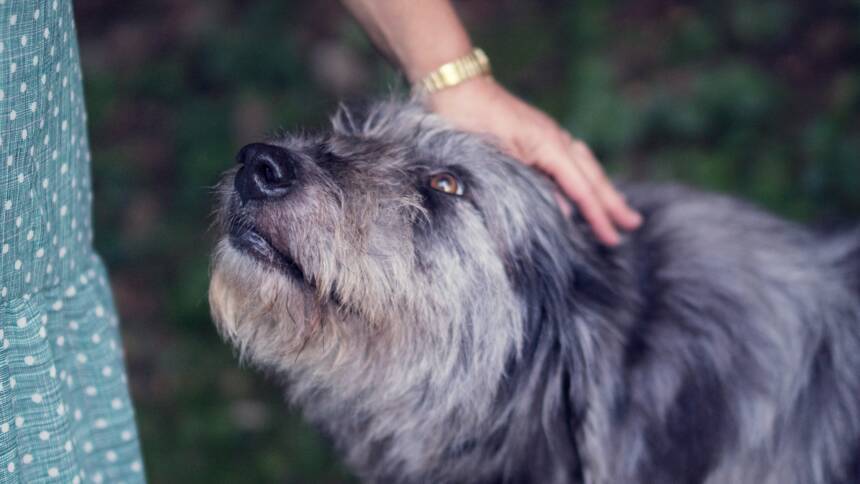
Dog quick bleeding is a common issue faced by pet owners who perform nail trimming at home. The quick, which is the part of the nail that contains blood vessels and nerves, can sometimes be accidentally cut during the trimming process, leading to bleeding. It’s important for dog owners to know how to handle such a situation calmly and efficiently to minimize stress for their pets and to prevent further injury.
Stopping the bleeding promptly is crucial as it not only helps in reducing blood loss but also lowers the risk of infection. Pet owners should have the right supplies on hand, such as styptic powder, cornstarch, or potassium permanganate. These products help to clot the blood and seal the wound when applied to the affected area.
In cases where bleeding is severe or does not stop with home remedies, it is important for the owner to consult a veterinarian. A professional will provide proper care and ensure there are no additional concerns such as a broken nail or an underlying clotting disorder. Safe trimming practices, such as using the correct tools and knowing how to locate the quick, are essential in preventing this type of injury. Owners are encouraged to seek advice from veterinarians on safe nail trimming techniques to safeguard the well-being of their pets.
Understanding Quick in Dog Nails
The quick in a dog’s nails is a core structure that houses important blood vessels and nerves. Recognizing and avoiding the quick during nail trimming is vital for a dog’s well-being.
Anatomy of Dog Nails
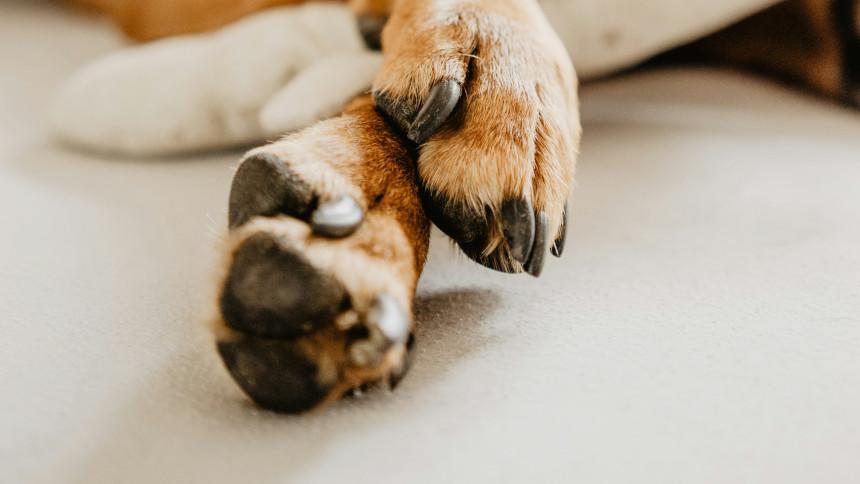
Dog nails are made up of a hard outer shell and a sensitive inner cuticle known as the quick. It is the living part of the nail that feeds blood and nurtures nerves to the nail, which is why it can lead to bleeding and discomfort if cut. Here is a simple breakdown of the nail’s anatomy:
- Keratin Shell: The tough, protective outer layer.
- Quick: The inner, vital area that contains:
- Blood vessels: Supply blood to the nail
- Nerves: Provide sensation
Trimming a dog’s nails too close to the quick can cause pain and bleeding due to the richness of blood vessels and nerves present there.
Identifying the Quick in Different Nail Colors
Identifying the quick in a dog’s nail is easier in light-colored nails, where it appears as a pinkish area within the nail. For nails that are light-colored, the quick is visible through the semi-translucent keratin shell as a pink triangle that starts at the nail’s base and tapers towards the tip.
| Nail Color | Quick Identification |
|---|---|
| Light | Look for a pinkish hue inside the nail. |
| Dark | More challenging, but look for a change in texture or color. |
For dark nails, it’s more challenging to spot the quick as it’s obscured by the nail’s pigmentation. One must observe the nail’s cross-section while trimming. As the cutter approaches the quick, a dark nail will start to reveal a grey to black homogeneous color. When trimming dark nails, it’s advised to cut small slices to avoid reaching the quick.
Causes of Bleeding
When a dog experiences bleeding from the nail area, it often results from common nail trimming mistakes or from various injuries and environmental factors.
Common Nail Trimming Mistakes
Improper Nail Trimming: One prevalent cause of bleeding is cutting the nail too short. Known as “cutting the quick,” this occurs when the sensitive part of the nail that contains blood vessels is accidentally snipped. Dogs with dark nails are at a higher risk, as the quick is harder to see. Owners or groomers may inadvertently cause a cut, leading to bleeding.
Lack of Experience: Without proper knowledge or experience, a pet owner or an inexperienced groomer can easily make mistakes while trimming a dog’s nails. This reinforces the value of professional grooming services, where the risk of such incidents is typically minimized due to the expertise of the staff.
Injuries and Environmental Factors
Trauma: Dogs can also experience cuts and bleeding of the quick from external trauma. Rough play, stepping on sharp objects, or aggressive scratching against abrasive surfaces can lead to injuries that cause bleeding.
Foreign Objects: Encounters with foreign objects, whether indoors or outdoors, can result in puncture wounds or lacerations in the paw or nail area. Vigilance in the dog’s environment is crucial to mitigate such risks.
Each of these factors can lead to discomfort and stress for the dog, emphasizing the importance of careful nail maintenance and awareness of potential hazards in a dog’s daily activities.
First Aid for Quick Bleeding
When a dog’s nail quick is injured and bleeding, swift and precise first aid measures are crucial to mitigate bleeding and prevent infection.
Stopping the Bleeding
First aid for a bleeding quick begins with applying pressure to the wound. Using a clean paper towel or cloth, one should apply gentle yet firm pressure to the area. This helps to control and reduce the flow of blood. In the absence of specific tools, common household items like cornstarch or flour can be utilized to aid in clot formation.
If available, a cotton swab soaked in styptic powder should be pressed onto the quick to promote faster cessation of bleeding. If bleeding persists for more than several minutes despite pressure application, seeking immediate veterinary attention is advised.
Products to Stop Nail Bleeding
The market avails several products specifically designed to stop quick bleeding:
- Styptic Powder: The most recommended product which, when applied directly to the quick, helps to constrict blood vessels and stop bleeding.
- Styptic Pencils: Containing silver nitrate, they are effective but may cause a stinging sensation.
- Home Remedies: In absence of commercial products, cornstarch or flour can act as coagulants, while a bar of soap can be used to plug the nail’s end temporarily.
Each product calls for direct application to the bleeding quick, followed by several minutes of pressure to ensure the bleeding stops. These measures serve as immediate first aid and are not a substitute for professional veterinary care if the condition warrants it.
When to Visit a Veterinarian

In cases where a dog’s quick is bleeding, prompt and appropriate responses can often manage the situation at home. However, certain scenarios necessitate veterinary intervention to prevent more severe complications such as infection or blood loss.
Assessing the Severity of the Injury
Dog owners should assess the severity of the nail injury to determine if it requires a vet’s attention. If the bleeding stops within a few minutes of at-home care, such as applying pressure or using styptic powder, it might not be necessary to see a veterinarian. However, if the bleeding is profuse or continues for more than 10-15 minutes despite attempts at first aid, this may indicate a more substantial injury requiring professional care.
Symptoms Requiring Professional Care
Immediate veterinary care is imperative when a dog shows signs of:
- Excessive blood loss: Continuous bleeding could lead to weakness or shock.
- Signs of infection: Such as swelling, redness, or discharge at the site of injury.
- Pain and discomfort: If the dog is in significant pain or is non-compliant with handling the paw.
- Recurrent bleeding: If the nail starts to bleed again with activity or after the initial clot has formed.
- Visible signs of additional damage: Such as a bone or severe nail bed injury, or if other injuries are present.
- Weakness or lethargy: Which could be signs of internal bleeding or shock in severe cases.
If any of these symptoms are present, or if in doubt, seeking a veterinarian’s expertise is the best course of action to ensure the health and well-being of the dog.
Dressing and Bandaging Techniques
When dressing and bandaging a wound, it’s critical to execute proper technique to facilitate healing and prevent further injury. Bandages must be applied securely and monitored frequently to ensure the pet’s safety and comfort.
Proper Application of Bandages
For effective bandage application:
- Clean the wound with warm water to remove any debris, ensuring a clear view for dressing.
- Place a nonadherent gauze pad directly on the wound to absorb fluids and avoid sticking to the wound bed.
- Wrap with conforming gauze to hold the primary layer in place. For paws, ears, and tails, ensure the gauze is not too tight to cut off circulation.
- Secure with medical tape around the edges of the bandage, but not directly on the pet’s skin to avoid discomfort upon removal.
- Monitor regularly for signs of slippage, tightness, or swelling beneath the bandage.
For wounds on legs, ensure the bandage extends above and below the injured point, adding stability. For torso or chest wounds, a bandage may need to encompass a larger area and be secured around the body, taking care to allow for normal breathing and movement.
Ensuring Safety and Comfort
- Check bandages daily for any sign of wetness, odor, or discharge which can indicate an infection or poor healing.
- Inspect the area around the bandage for swelling, which suggests the bandage might be too tight.
- Change bandages as directed by a veterinarian to prevent skin maceration or irritation. For paws and feet, ensure the pet retains proper footing to prevent falls or injury.
If discomfort or complications arise, consult a veterinarian immediately. Proper aftercare and monitoring are essential for a safe and successful healing process.
Nail Care and Preventing Future Bleeding
Keeping a dog’s nails trimmed is the cornerstone of preventive care to avoid nail bleeding. Proper tools and techniques are essential for safe trimming and ensuring the pet’s comfort.
Routine Nail Trimming
Regular nail trimming is necessary to prevent a dog’s nails from becoming too long, which can lead to discomfort and nail injuries. Dogs typically require nail trimming every 3-6 weeks, but the frequency can vary based on the breed, activity level, and rate of nail growth. Owners should become familiar with the growth pattern of their pet’s nails and establish a consistent routine for trimming.
- Long nails can curve and grow into the dog’s footpad, causing pain.
- Overgrown nails can affect the dog’s gait and posture, potentially leading to long-term health issues.
Tools and Techniques for Safe Trimming
Selecting the correct tools is crucial for safe and effective trimming. A variety of nail trimmers exist for dogs, each suited to different sizes and breeds.
| Type of Trimmer | Best for |
|---|---|
| Scissor trimmers | Larger breeds, thicker nails |
| Guillotine trimmers | Various sizes, precise cuts |
| Grinder tools | Smoothing edges after cutting |
Using the proper technique while trimming the nails ensures the quick is not harmed:
- Gently hold the dog’s paw and separate the toes.
- Identify the quick, the pinkish area within the nail where blood vessels and nerves are located, to avoid cutting too deeply.
- Trim steadily and in small increments, taking care not to cut into the quick.
- Smooth the edges of the nails after cutting to prevent snagging and splitting.
If an owner is unsure about how to safely trim their dog’s nails, seeking instruction from a professional groomer or veterinarian is advised. Regular trimming, using the appropriate tools and techniques, will help maintain the dog’s nail health and prevent future bleeding incidents.
Managing Pet Anxiety and Pain

When a pet’s quick is bleeding, managing their anxiety and pain is crucial. A calm pet is easier to treat, and effective pain relief is essential for their well-being.
Reducing Stress During Trimming
Pets often feel anxiety during nail trimming, which can increase if they experience pain from a bleeding quick. Reducing stress is paramount:
- Prepare: They should be familiar with the process by gradually exposing them to nail trimming events.
- Environment: Perform trimming in a quiet, comfortable space to help them feel secure.
- Distraction: Use their favorite treats to associate the experience positively.
- Restraint: Avoid excessive restraint, but if necessary, a soft muzzle can be used to prevent biting without escalating discomfort.
Pain Relief and Comfort Measures
Effective pain management helps pets recover without undue distress:
- Prompt Attention: Addressing the bleeding quickly can help reduce pain connected to the injury.
- Pain Relief: Consult a veterinarian about appropriate pain relief if the pet seems to be in significant discomfort.
- Aftercare: Providing a soft bed and limiting activity can promote healing and reduce pain post-injury.
- Monitoring: Observe the pet closely for signs of persistent pain that might necessitate veterinary attention.
Alternative Remedies and Coagulating Agents
When a dog’s quick begins to bleed, it is essential to act promptly to minimize discomfort and prevent infection. Owners can utilize both natural home remedies and commercial coagulants to achieve hemostasis—the stoppage of bleeding.
Natural Remedies
Cornstarch and Baking Soda: These common kitchen staples can be used effectively as coagulating agents. To apply, one can press the dog’s bleeding nail into a bowl of cornstarch or baking soda, ensuring the quick is thoroughly covered.
- Cornstarch: It acts as a mechanical barrier to blood loss.
- Baking Soda: It assists in drying out the wound and encourages clotting more quickly.
Commercial Coagulants
Styptic Products: Widely used in the grooming industry, styptic pencils, sticks, and powders contain astringent compounds that help seal injured blood vessels. The main ingredient, silver nitrate, facilitates blood coagulation.
- Styptic Pencil/Sticks: Convenient for precise application directly onto the affected nail.
- Clotting Powder (e.g., Kwik Stop): Often preferred by grooming professionals for its fast-acting coagulation properties.
Owners should have these remedies on hand as a precautionary measure when trimming their dog’s nails.